


Everyone that sews has scraps. Finding creative and resourceful ways to kill those scraps is one of my favorite things. Today I'm going to make Bias tape, using the continuous method. It saves so much time, because you don't have to piece together all your tape like in other methods. In fact two small seams is all the sewing you'll be doing!

Supplies
- Bias Tape Maker (1/2 inch version)
- Scrap Fabric
- Iron and Ironing Board
- Starch (helps the tape keep it's shape.)*
- Ruler
- Shears
- Marking instrument (I'm using an air dissolving ink pen, but you could use chalk or pencil)
- Pins
- Sewing machine
- *optional
1. Iron your scrap and figure out how big of a square you can cut from it. It needs to be a perfect square though, as in equal on all sides. I'm using a 12 x 12 inch square here, which produces a good amount of bias tape. Be sure to remove the selvage! If you leave it on, your bias tape will distort really wonky once washed. That's a pretty standard rule when sewing anything really.


2. Fold in half to form a triangle and press. This Forms your cutting line.Go ahead and cut your fabric.


3. Turn one piece of fabric until it looks like this.Stitch along the center line, right sides together. Trim seam allowance and press open. Mark 1 inch sections a long the whole piece.


4.This is where it can get a bit tricky. Offset the lines so you have one of the sections connecting to nothing, while all the other fabrics line up. It might be easier to press the seam allowance out when matching. Sew right sides together.

Here's the seam allowance pressed back.

See how it's offset. this is what makes the loop continuous. Otherwise you'd just be cutting out 12 individual loops
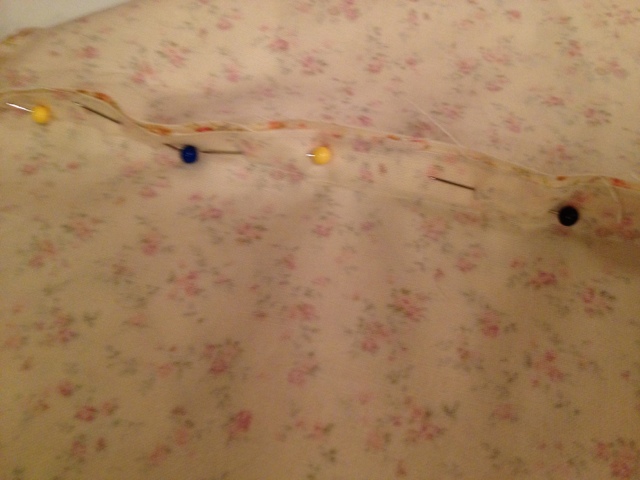
Pin it as you go along matching.

It should look something like this.

sew being careful not to catch any other fabric in the seam. It's hard because it's a weird angle to sew something together. Go slow! Make sure to Trim the seam allowances really close! It helps when ironing to not have extra bulk!
5. Starting from one of the offset edges, start cutting!


6. Now the easy part. Feed the tape into your bias tape maker. Use a pin if it's not going through very smoothly. Iron the tape and pull the bias tape maker at the same time. Use some starch if it's being finicky in staying pressed. This usually happens at the seam allowances.


TADA! Homemade bias tape. This batch is destined to line a sorbetto top!


I roll it up immediately unto cardboard scraps after I've finished so it keeps it shape.
I hope the tutorial was clear! Let me know what you think!


Hi, new follower here. Great tutorial. I've been trying to figure this out for some time and it's very clear. Thanks!
ReplyDelete