Showing posts with label diy. Show all posts

Hark, A Sink!


I know I just did a post on the bathroom, but I've already made one major change. 

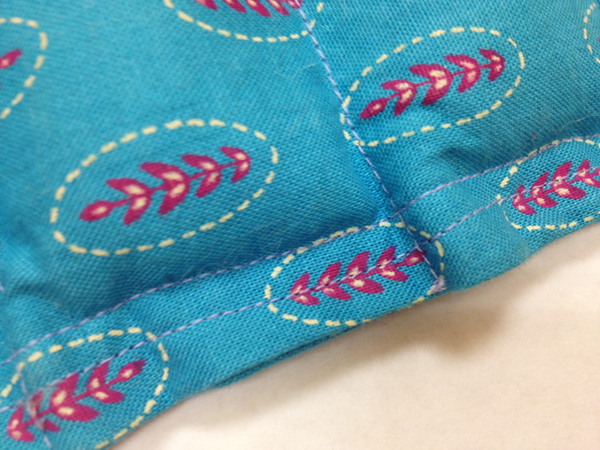
As you can tell from the picture above, it's a pretty small bathroom.  Our sink, while pretty, was way too deep for this space. So much so that if one person was brushing their teeth, another person couldn't fit behind them. Since this is our only bathroom it can be an issue. 

So when I got my tax return I decided to splurge a bit and buy a new sink. 
Enter IKEA. 


I purchased the Lillagen Sink for about 180 including faucet. The nice IKEA lady assured me I could do it without any prior plumbing experience. I liked this model, because it's small, and actually gives me a bit of under sink storage, which I really needed.


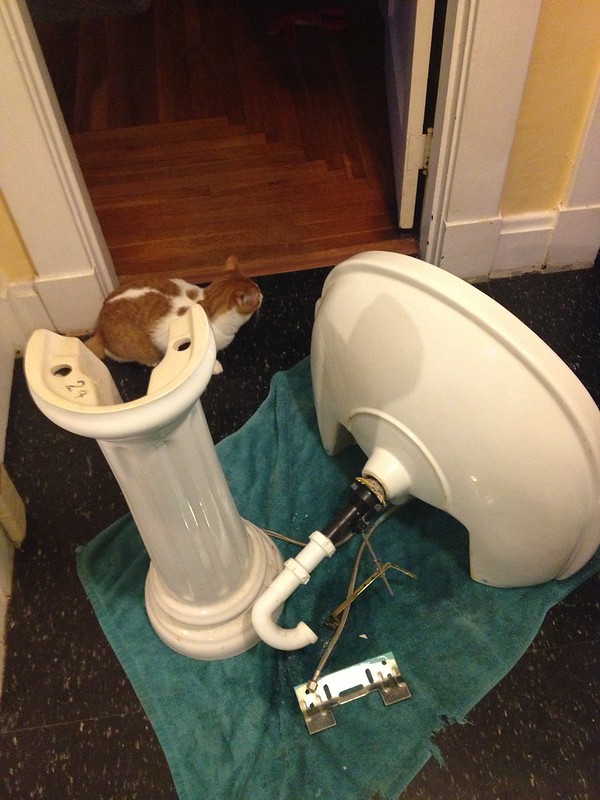
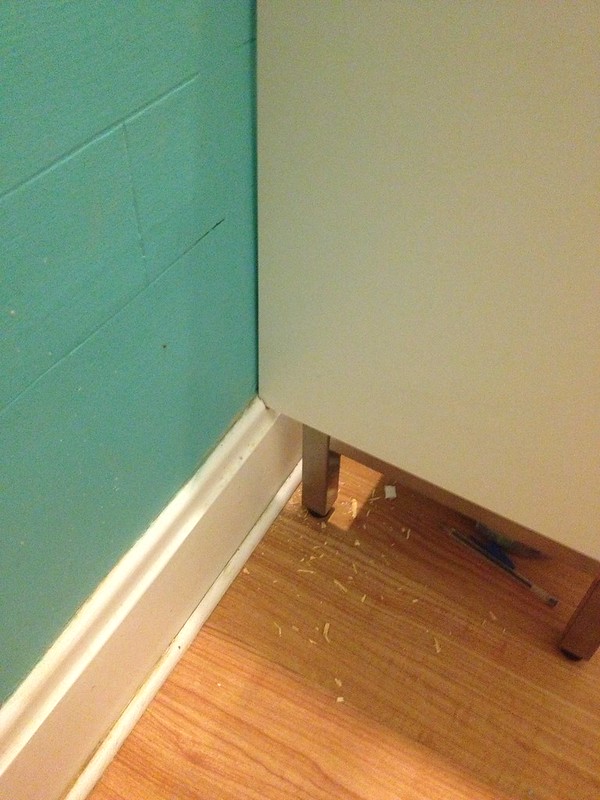
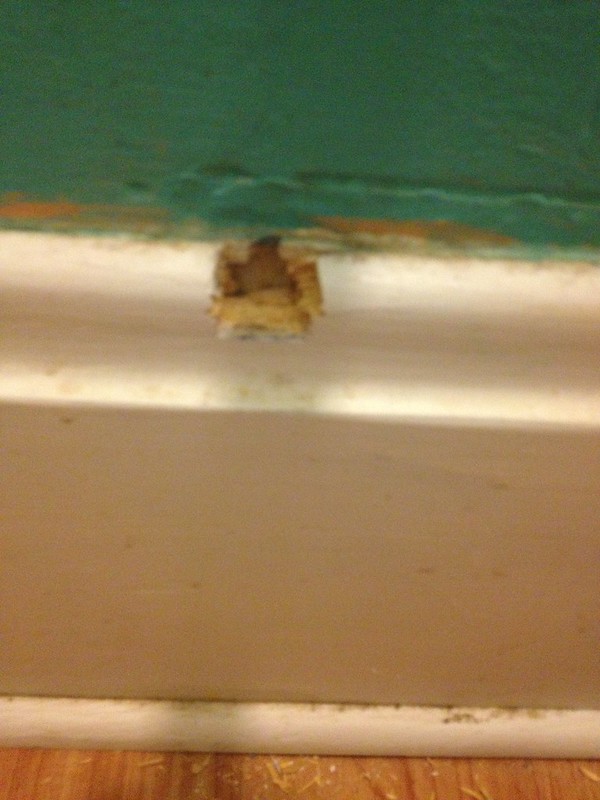
First step was to remove the sink. Here's something the IKEA directions won't tell you. This part is going to be gross. Make sure you have a bunch of old towels to sop up water from the P-Trap, and make sure you've got some paper towels to shove into the P-trap so that your whole house doesn't fill with really disgusting methane. Also cut the caulk around the sink really thoroughly  I didn't cut deep enough on one side and tore through a couple layers of paint. It's just a pain in the butt to fix, save yourself the time. 

Bonus Photo! This is how small were talking. Also, look at me, the lazy homeowner who still hasn't put a flooring transition in for the bathroom flooring. Probably because I just want to tear out the bathroom flooring anyways. 


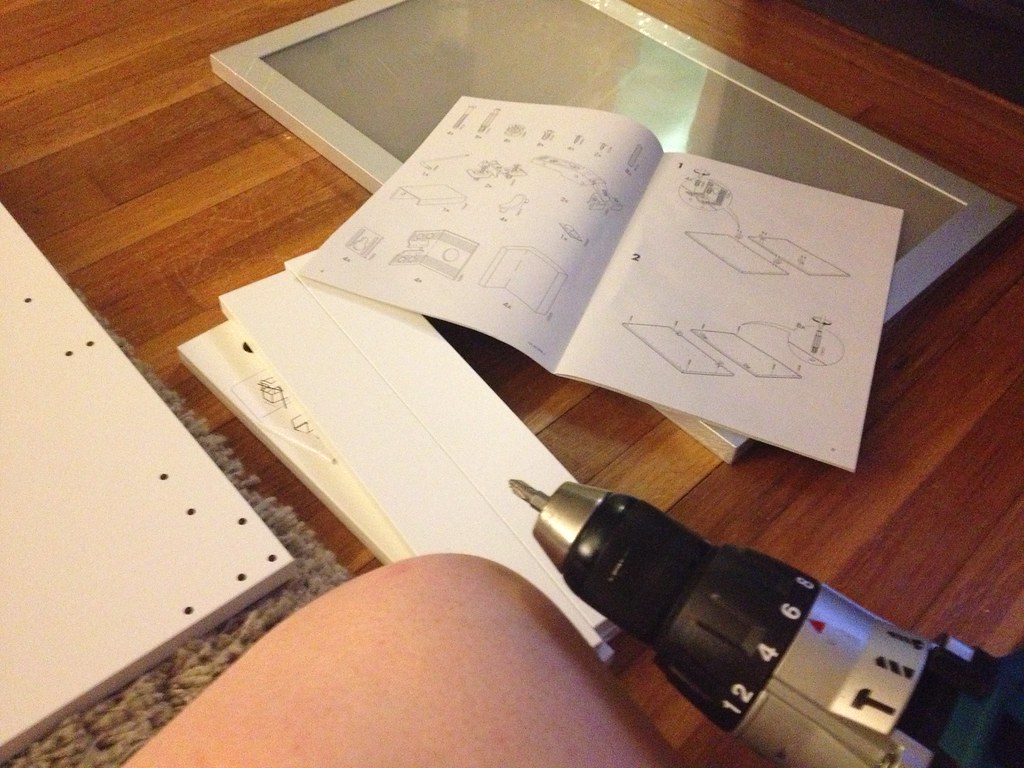
Now you'll want to build your sink. For the smallest Lilliagen sink, I ended up with double the hardware I actually needed. I think it just saves time packaging to have the same hardware pouch for all the sizes. Still, it made me feel like I did something horribly wrong, but in the end it turned out fine. Don't stress! 


Remember not to let your cat judge you too much during the building process. He gets excited about IKEA boxes, so his judgement should be taken lightly. 


If you have larger moldings  you're gonna have to chisel them out a bit to get the sink to sit flush. I just used a flat head and a hammer. There's probably a more exact and elegant solution to get this done, but we keep it real here at  Lux Per Diem. 


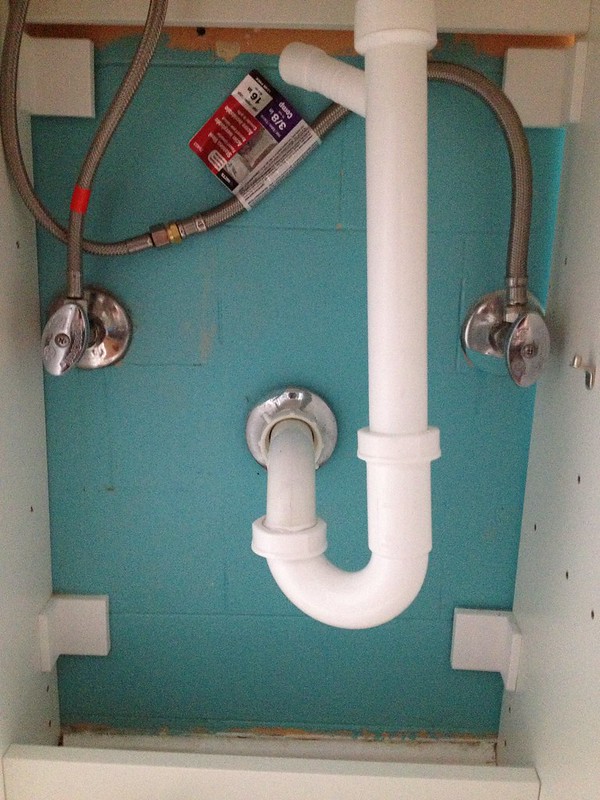
Anchor your sink cabinet into the wall. Fun fact, you probably want to measure and make sure this sink will fit over your water line knobs thingys (technical I know). Mine, probably by sheer will alone, just barely fit. You can see how close I'm cutting it by the right knob. 

Lay some caulk down around the top of your sink cabinet and place the sink on top. You really only have like less than a minute to get that bad boy straight, so do your best. Mine's not perfect, but damn good anyways. 


Follow the IKEA instructions as far as the plumbing goes. This is one of the few times I wish there were written instructions along with the pictograms. Making the IKEA PVC fit onto the PVC in my house involved lots of waterproof thread tape, and brute force. Also since the Faucet is off centered to the left, I need an extension piece (the piece with the tag still attached) to make it actually reach my supply line. After about three trips to Lowes, I actually ended up just bringing the whole faucet and finding the piece that fit the coupling. It might help had I actually asked a sales associate, but this is me when it comes to Lowes.


Learn from my mistakes dear readers. 

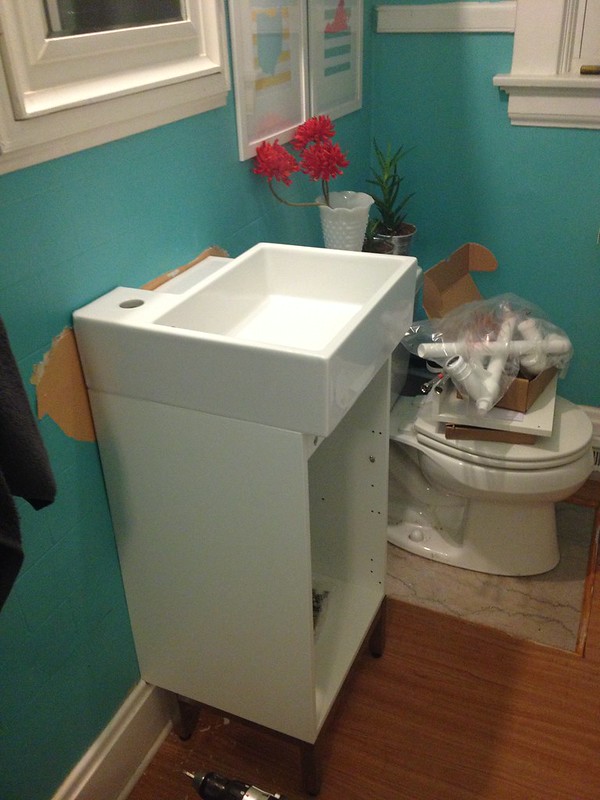
This is what I ended up with two days later. 
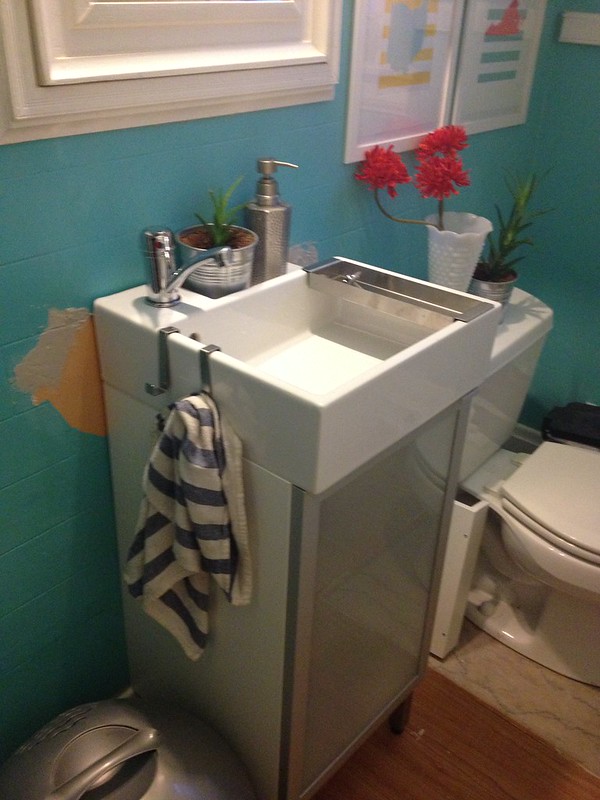
See the shelf for the cabinet leaning again the toilet? Yeah that bad boy didn't fit at all around my P-trap. I probably did it wrong, but honestly I was so sick of plumbing I wasn't going to take it off. I ended up just tossing it. 
I still need to repaint the walls where the old sink was. 
I need a new litter box because this one doesn't fit with the new sink. 

Just more to add to my to do list I suppose. 

I like this sink much better! It's less deep, and two people can actually fit in the bathroom. I'll get a full room shot once I repaint, but given my track record with timely painting, it might take awhile.

Did you guys have a good weekend? 


Posted in , , | Leave a comment

Packing Up Christmas


One of my favorite times of year is officially over. It's time to say so long to all my fun holiday decorations. 

In a bid to be proactive on the organizational hell that is my basement, I decided to pack Christmas up right. Not to mention the fact I dealt with a lot of broken ornaments when I unpacked them this year. So I need something that keeps things safe and organized. 

Of course I turned to my main girl Martha. She had a pretty easy/cheap diy for packing up all your holiday delicate.


I mean she's Martha, so her's are going to look 1000x better than mine, but it ended up working very well.

Untitled
Since we eat like four dozen eggs a week on paleo, egg cartons were in no short supply. Not the prettiest, but seriously functional. Who knows, maybe I'll get weird and paint them white or something next year. 

Untitled
Look how perfectly these babies fit in here. 


Untitled
I traced the bottom of the box on black cardstock. I wanted white, but all three stores I went to were out, maybe everyone had the same idea? It really doesn't matter though, you'll only see it for a few seconds every year so who cares. I hot glued the cups down using my 2$ glue gun from joanns. Worth all 200 pennies I spent on it honestly. 

Untitled
Repeat and stack! I was able to fit two layers deep, plus some space on top for garlands and wreaths, no smooshing required. 

Don't let the picture online fool you, you could practically fit four dead bodies, comfortably, in this bad boy. In fact, if your tree is under five feet, you can just stick the whole thing in there no problem. 

I'm glad to have everything packed up neatly now! 

How do you store holiday decorations? 

Posted in , | 1 Comment

DIY Rice Heating Pad


When I'm sore, cold, or sick there's just something about a heating pad. Since I'm basically queen of making do with what I have, I've been known to fill a long sock with rice and heat it up in the microwave  The rice stays nice and hot, and is easy and cheap to use.

Yesterday as I was cleaning out my sewing room, going through my huge scraps box, when an idea struck me. 

Instead of using socks, I'm sure I could scrap bust and make something a bit prettier and functional. 
Thus was born my rice heating pad. Mine ended up being the exact same side as my ipad, which works well for me. If you made yours a bit longer it could be great for using around your neck. 

It took me about ten minutes to make, which probably explains the lack of pictures. I tried my best to diagram it out for you. If you have any questions don't hesitate to ask. It's really simple, I promise.


Cut a piece of fabric that is going to be about an inch longer double the amount of height you would like your final heating pad to be. 


On your long sides, press the seam allowance in. 
Then Fold it in half, hot dog style, so the right sides are touching. Sew using about an inch seam allowance. Trim your seams.

Flip your pouch out again so the right sides are on the outside. Press so your seams are neat. 
Then sew channels along the pouch on the outside. Leave enough room so it's not hard to get rice in. You sew the channels so the rice stays evenly distributed, and so it can easily wrap to you body.
I used a funnel to get in my rice, leaving enough room to sew it shut. 
I sewed a double row of stitching just to make sure it was secure.


And your done. This is a handy little heating pad, and make great gifts. Now that it's getting colder, we all could use a little heat, no? 

To use, simply place in your microwave and "cook" for about a minute at a time until it reaches the desired temperature. If it's too hot, wrap it in a hand towel until it cools down. 

Posted in , , , , | 2 Comments

Dresser Makeover


I purchased this dresser off of craigslist for 50 bucks. I didn't have the sense to photograph it before I stripped the horrible brown paint off of it. I stripped and sanded this piece down, and went about staining it. Halfway through the staining process I realized that the lighter wood wasn't taking the stain the same as the other wood. It was time to improvise. 

I broke out some white left over house paint, in high gloss. 


Check out that white and wood two tone action. I also spray painted the original hardware a gold metallic color. 


Posted in | Leave a comment

White Wood Floors

I know like many other people I've lusted after the very Swedish painted white wood floors. I had just the room to do it in too! The "guest bedroom" Which really is just a catch-all room where laundry and extra furniture ended up. While it has wood floors they weren't very nice. Gouged and stained from the previous owner. Check out the listing photo to see what I mean...

They actually look much better there than they do in real life. 

I know some people feel very strongly about painting wood. I don't though, and since it's my house you really shouldn't care if I paint a very shitty wood floor. 

I started off sanding what little finish remained on the floors. 

Then I put two coats of primer down.

There was some staining that still came through the primer, I though about using kilz... but I got lazy.

Then I used valspars paint and primer for three more coats in a satin finish. High gloss is really hard to keep clean on a floor. 

Then since the floor is so so white, the rest of the at least 20 year old paint looked awful and yellow. So We set to paint all the trim with the same valspar paint. Also decided on a few samples for a new wall color.
Behold! The world's worst iPhone panorama! It looks 100 times better even in this halfway complete state. I'm waiting on the floor to be completely dry before I start working on prepping the walls for paint though. It's been about three days and it's still kind of tacky. Cincinnati has been pretty humid, so I'm not going to pull my hair out if it takes more than a week to dry.

 I'm considering putting a poly top coat on, but that might be more hassle than it's worth. I've heard that back in the old days, people would paint their woods floors once a year in the spring to keep up with maintenance. That seems really doable. Even if it's just to touch up scuffs. 

We decided to go with Belle Grove Aloe Green by valspar for the walls.(It's the paint sample on the left wall in the picture above.)
It looks a bit more blue on our walls than in the sample. It's pretty soothing though, which is good, because this room is going to our new bedroom, surprise! The whole bedroom dreaming moodboard has actually been set into motion. While I love how much room we have in the loft, summer+not the greatest insulation+second floor bedroom=cranky Paige. It gets VERY hot. 

One day we are ideally going to gut and redo the upstairs, adding more vents and insulation. Until that day though, I can't handle the heat. I also have this really unreasonable fear that one of the huge trees surrounding our house will fall and kill me while I sleep. I'm obviously really reasonable. 

There's still a bit of one stain that peeks through. Our bed will be over it though, so I'm not too concerned. There's still so much work that needs to be done in this room, but I'll keep everyone updated! 


Posted in , , , , | 4 Comments

A Tangible Budget


I am so terrible at keeping track of my money. So last night the boyfriend and I decided that we needed to set a firm budget, even for the fun stuff. Knowing myself I thought it would be best to keep my budget tangible. I'll be taking out the money I've budgeted for different things and keeping them in labeled envelopes. It's pretty fool proof. If I've only got 20 that week for fabric, no sale will make me spend more than I want. 

But since I have a surplus of pretty paper and labels I thought I'd make my own envelopes. I made a template for them if you'd like to make them as well! They'd make for a much prettier presentation of a monetary gift than most people are used to! 


Basically all you need to do is trace and cut your desired paper. Fold all the edges in, and glue the over lap on the long sides. Then glue one of the curved flaps on top of the longer sections. To close them I just fold the top flap into the envelope. 


Posted in , , , | 3 Comments

Handmade Notebook


I go through notebooks more than any other adult I know. I am a total obsessive pen and paper writer. I'll admit it, I buy really hisptery notebooks too. Which for the materials they are made of, are grossly overpriced. So I decided to give it a shot using only things I had in my house. 

  
Get some cardboard and some computer paper. I used the lid of the paper box. You could buy some new cardboard, but I could see a cereal box working very well. Make sure it's nothing too thick. 


Fold the amount of paper you want in your notebook. I think mine used about 25 full sheets of paper, making 50 pages, 100 if you're counting both sides. Fold your paper in half  evenly, using a bone folder or you nails to really get a nice clean crease.  Stack papers with fold open on top of each other. 

Cut and score your cardboard to fit your pages. 

Using paper clips get everything centered. Stitch down the middle using a longer straight stitch on your machine. GO SLOW GUYS. You don't want to break a needle. 

Admire your wiggly stitch line. 

Ta-da! a basically free notebook. If you're like me though you can't leave something simple well enough alone. So I did a bit of decorative stitching down the front.


Posted in | 7 Comments

Make Do And Mend

Here's an older article of mine while were having imac issues. all problems will be resolved by tonight and I'll be able to access all the photos for the upcoming posts. In the meantime enjoy reading about one of my favorite sayings, Make do and mend.


illustration by clare owen.
  "Waste management in the U.S. is in a state of anarchy with no effective federal plan in place to maximize recycling and minimize waste. America generates more waste every year, growing from a 247 million tons of non-hazardous waste in 1990, to 409 million tons in 2001," According to Biocycle magazine, an Waste management industry magazine.  
  We live in such a disposable culture. I'm sometimes shocked at how people can so wasteful, and I'm no recycle saint. Almost everything you buy in a store come pre package, wrapped in plastic, and single serve. Were buying 100's of pairs of shoes, and throwing away clothes when they get the tiniest of defects. I knew a girl who would throw away clothing rather than having to lug it to the laundry mat to wash it.  Or a friend had a button that fell of a dress and was upset because she'd have to throw it away. Then was amazed when I pulled a sewing kit out of my bag and fixed it for her. "I could never mend anything, I'm not talented like that. " She said to me later. 
I guess I was just lucky enough to grow up without a lot of money. Being one of six children, and having four kids young and living at home, my mother was thrifty, smart, and able to fix anything. We got almost all my clothes at yard sales and thrift stores before I was in middle school. Once washed mended and improvised by my mother, I was one of the best dressed, and cleanest kids I knew. I had countless dresses that my mom had made for me from scratch. People were always complementing my Mum on her well dressed children. When I got to middle school though, I started to become a consumer of goods. Embarrassed by home made dresses, and not willing to set foot in a thrift store. I wanted the mall, I wanted cheap clothing that wouldn't make it through the year. I wanted shoes that lighted up when I stepped. I became disposable. 
The Phrase "Make do and Mend", comes from WW2 when things were rationed as to support troops. Stories from that era are inspiring as far as improvising and working with what you've got. The following story accounts that time. "We had to make do and mend — that was the order of the day, and everything we had got in the wardrobe was kept there, we never threw anything away. I can remember when I was expecting my first baby I was wondering how I could get a christening gown for her and I thought of my wedding dress, but I couldn’t bare to put the scissors into it. A few weeks later I went and had another look at it and thought as there was a war on I would have to use it. I got it out and cut a great big piece out of it to make the christening gown, which turned out quite well, and when my little girl was four years old she was in a maypole dancing troupe and she needed a white dress, so I went back to the wedding dress and cut a bit more out of it and made her the little white dress. It was like that with other things like summer dresses.
You see during the war most ladies wore skirts and blouses because a skirt only took about a yard of material, and if you bought a dress you would have to pay a lot more money for that. Sometimes you would cut the top from a summer dress and use that as a top, but the majority of them had knitted jumpers and the wool was very important.
When the war started I had got a big bag of wool because I had always been a knitter. I looked at it one day, and thought I would knit the children a jumper, and you would be surprised how nice the jumper looked just but using up oddments of wool. People used to comment on it. Now that’s how we went on.
Men’s shirts during the war and before the war were made of linen or cotton, they had loose collars, some had two collars and some had three, and after a time the collar would begin to fray and when all the collars had frayed we used to throw the shirt away We couldn’t do that in the war, the shirt had got to be worn until it was threadbare. I used to unpick the collar, and I cut the tail off the shirt and was able to reface the collars and then they were like new again. With turnups on the trousers when they frayed, where they hit the boot, we would cut off the bottom of the trousers and turned it up slightly so that the frayed part was on the inside, the same with the cuffs on the shirts. It was amazing what we could do with what we had got and how we made do." - Winifred Barber *

It's not even until recently I took a step back and realized the extent of my clothing, how little of it I actually wore, and how much I "gave up" on clothing that was ripped or stained. Thats the day I started thrifting and sewing again. Looking for vintage that could stand the test of time, and sewing that occasional button back on. The idea of making do and
 wasting less has started traveling to other parts of my life. My boyfriend and I recently moved in together and made a pact to make as little impact on our environment as we possibly could. We've started shopping local, using our own bags, and buying nothing prepackaged. I know we lucky enough to have farmers markets, and the Findlay Market, which helps a lot. Plus our city of Cincinnati has a new recycling system where you can process almost anything. But it's all new and baby steps for me. I think thats whats important though, just think if we all took baby-steps towards saving the world? 
I have this challenge for my readers, rework a piece of clothing that you've given up hope on. Something you've torn, stained, or even go so far to say "ruined". If you don't know how to fix something, try googling it. If you're reading this blog right now, you're luckier than 25 percent of people in the US that don't have internet access. Use everything you have, and make do readers. Every little step people take will start to add up. 
I "ruined" my favorite dress yesterday. A piece of blue clothing made it's way into my load of lights. It came out covered in blue stain marks, my favorite nude dress was ruined. I moped and moped. It being one of the only "new" pieces of clothing I had gotten myself recently. I then realized I was determined to fix it. I mean you can ruin something already "ruined" right? 
I had some leftover black RIT dye sitting in my cupboard, I set to work dyeing it.

Although still wearable, the blue kind of ruins the whole nude trend.


getting the dye ready on the stove
 
Heres the finished product, taken with photobooth (my apologies)
Not too shabby, kind of goes along the inky tiedye trend thats popping up if I do say so myself. 

-Paige

*WW2 People's War is an online archive of wartime memories contributed by members of the public and gathered by the BBC. The archive can be found at bbc.co.uk/ww2peopleswar

Posted in , | 2 Comments