Showing posts with label sewing. Show all posts

On The Sewing Table: M6560

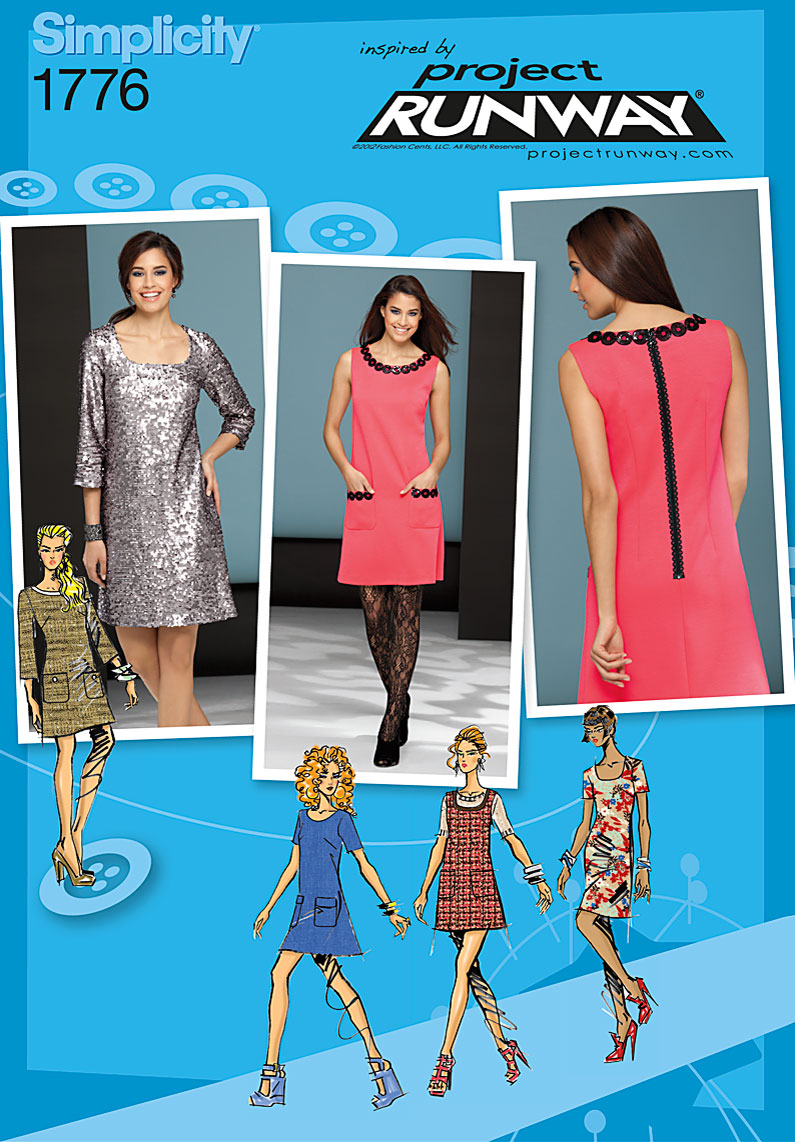
I've been working on this pattern, and am almost done. I still have a few lining and finishings to sew.

Yesterday I tried it on and it just didn't seem right. It hit me in kind of a weird spot, and make me look more stocky than normal. If it was already too short, it would be even worse when I hemmed it. I spent awhile trying to figure out how to lengthen and pattern match it so it didn't look like a mistake.

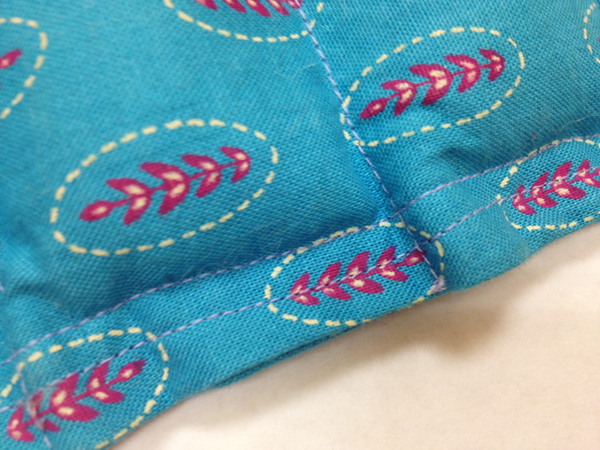
I quickly realized that if I put on a ruffle, it would a) be easier than trying to pattern match and hide seams, and b)just look way better than any other option.

So I got to work.

So much more flattering right? Totally evens out my line backer shoulders a bit better. I mean lets ignore the fact that I didn't have enough fabric to even keep the pattern doing the right way, but I don't think it matters. It's busy enough I don't think many people will notice, and it's just a little summer dress anyway. 

I still need to under stitch my lining, finish my interior seams, add the back buttons and maybe put in a waist stay. 

I did have a bit of a zipper malfunction  So I tried sewing an invisible zipper with my machine's zipper foot instead of the correct invisible zipper foot. I hate to admit it's because I was too lazy to go downstairs to look for it, but that was really the case. So my invisible zipper is very visible. 
I'm REALLY don't want to pink the entire zipper, but it looks like I might. I think I should have a huge poster in my house that says, "Just do it right the first time." because I swear it'll be my downfall.

I \got kind of confused when I was sewing in the lining. What on earth I was supposed to do with the straps? So here's how you sandwich them in case anyone else has the same issue. 
So you lay your outer bodice right side up, and fold you basted straps down so that everything lays flat and all the right sides are touching. 
Then you pin your lining on top of that, right side down. You need to be extra careful not to sew the strap into the seams with this method, but it looks really good when you do it right. I added extra pins just to keep the strap still. 

I should be all done with nice non iPhone photos of the finished product this weekend. I forgot how much I liked to sew! It's a good thing too, because I'm on a bit or a spending freeze in preparation for two upcoming vacations to LA and PR. So this is the only way I'll be getting any new clothes, but I'm okay with that.  I have a huge pattern and fabric stash, so it's about time I put it to good use! 


Posted in | 1 Comment

On The Sewing Table : M6560

So, I still sew, I just haven't recently. So when better to decide to sew a very springy dress than we were in the middle of the biggest snow storm of the year? Obviously there's some serious wishful thinking happening on my part. Anywho, I'll be sewing McCalls' 6560, and here she is.


I'm trying to work through both my pattern and fabric stash. No new patterns until I sew at least a few I already have. I brought this one at least a year ago, so it's about time. I also had some fabric that had no plans to be made into anything, until now. 


Pretty right? It's Valori Wells, Floral Birds in the Merlot color. This fabric feels great, it's a linen cotton blend, and something normally that would be way to expensive for me to even think about. I picked it up at a sale my local indie fabric store had awhile ago, so I scored big time. 

I'm actually pretty excited to fit everything onto my new me size mannequin. Then again, I'm a pretty big sewing nerd. 


Posted in , , | 1 Comment

Duct Tape, Undercover.


Recently I've been taking Gertie's online bombshell dress course. It involves a lot of fitting, and she does most of it on a dress form. For those of you that sew, you know fitting or draping a garment on yourself is very hard, if not damn near impossible. So I did what many people do, and made a duct tape dress form.


While not the most flattering thing to look at, it's very true to my actually shape. I'm not going to give you a tutorial on how to make one though, the web is already over flowing with those. This is going to show you a quickly make a jersey slipcover to make the look of the dress form a bit more professional. 

Note: If you're interested in my stand, I actually slipped my duct tape form over a vintage form I had, and stuffed around it using fabric scraps and newspaper. 


You'll need
-Serger/Sewing Machine 
I'm using a serger because it trims and has a better stitch for jersey. If you're using your sewing machine you'll need to use a zig zag stitch and trim all your seam allowances. 
-1 yard of jersey, either 2 way stretch of 4 way. I used two way stretch, although 4 might have been better. 
-Duct Tape to finish the bottom
-Lots of Pins 
-Scissors

Take your yard of fabric and cut in half on the fold. Start pinning around your form. If your using 2 way stretch fabric, make sure the stretchy side is running horizontal, so it stretches out wide ways instead of tall ways.

Leave the bottom and neck hole unpinned. 


Trim all the excess fabric around your form, this will be your guide for where to sew.


I then used my serger to serge up the matched sides. Make sure to leave the neck hole and bottom open. 
Flip inside out so the seams are on the inside of the cover. Slide over your dress form. I used a scrap of the jersey to pretty up the unfinished neck opening with a bow. I also taped the bottom of the jersey using black duct tape. You can't see it unless your laying on the floor, so I wasn't too concerned with how the bottom looked. You could also make the cover longer and sew a draw string in if you're really concerned with how finished it looks. 

Over all though I think it looks much better! 


Posted in , | 2 Comments

How I Store My Vintage Patterns

I know I've mentioned my sewing pattern hoard collection before. I own a lot. Probably too many.
I'd say my collection is about half vintage, and half modern.

I just had them stuffed in a box haphazardly for a long time, which made it hard to find anything. Also it wasn't doing any favors for my delicate paper patterns. (I have some dating back to the 20's!). So I decided to do something about it.

I got an idea from the most unlikely of places, my nerdy boyfriend Brian.

Isn't he handsome? PS this is totally at epcot, excuse the hat. 

Brian likes LOVES comics. In fact, I'm pretty sure the only reason we bought our house is because he could walk to the comic store from it. 

Who loves and wants to protect paper more than sewing pattern hoarders? 

COMIC BOOK NERDS.

In fact they have very specific products to protect and preserve their comics. I guess I just lucked out that my paper product was similar in size to theirs. 

Here's what you'll need. 
\

 
Long Boxes (I mean you could use the shorts, but my collection barely fits into the two long ones.)

I of course purchased these at my local comic book shop, any comic book shop should carry these supplies. 

I used the backing boards to stabilize my extra delicate vintage patterns. You can use them on the modern ones or not, it's up to you. You then put the pattern with or without the backing board into the bag and seal with a piece of acid free tape. The bags and boards are already acid free, which is awesome. You should end up with something like this. 


Easy peasy right?

Here's the entirety of my pattern collection, taking up way less room, and so much safer, than before.

 I used the backing boards, with tabs I cut from other backing board tape on them, to serve as dividers in my vintage box. I'll eventually organize the modern side into the big four pattern companies.

No pattern is safe around Taco though, his name should be paper destroyer. 

 A plus I've also found for using these comic book bags is that if you can't fit your pattern into the envelope, it's much easier just put it in the comic book bag. Better yet, for printable patterns you have an envelope to store your pieces.

I hope this helps you fellow pattern hoarders at least get your "situation" organized. Let's just all thank my boyfriend, with his nose in his Absolute Dark Knight book shall we?


Posted in , , | 2 Comments

DIY Rice Heating Pad


When I'm sore, cold, or sick there's just something about a heating pad. Since I'm basically queen of making do with what I have, I've been known to fill a long sock with rice and heat it up in the microwave  The rice stays nice and hot, and is easy and cheap to use.

Yesterday as I was cleaning out my sewing room, going through my huge scraps box, when an idea struck me. 

Instead of using socks, I'm sure I could scrap bust and make something a bit prettier and functional. 
Thus was born my rice heating pad. Mine ended up being the exact same side as my ipad, which works well for me. If you made yours a bit longer it could be great for using around your neck. 

It took me about ten minutes to make, which probably explains the lack of pictures. I tried my best to diagram it out for you. If you have any questions don't hesitate to ask. It's really simple, I promise.


Cut a piece of fabric that is going to be about an inch longer double the amount of height you would like your final heating pad to be. 


On your long sides, press the seam allowance in. 
Then Fold it in half, hot dog style, so the right sides are touching. Sew using about an inch seam allowance. Trim your seams.

Flip your pouch out again so the right sides are on the outside. Press so your seams are neat. 
Then sew channels along the pouch on the outside. Leave enough room so it's not hard to get rice in. You sew the channels so the rice stays evenly distributed, and so it can easily wrap to you body.
I used a funnel to get in my rice, leaving enough room to sew it shut. 
I sewed a double row of stitching just to make sure it was secure.


And your done. This is a handy little heating pad, and make great gifts. Now that it's getting colder, we all could use a little heat, no? 

To use, simply place in your microwave and "cook" for about a minute at a time until it reaches the desired temperature. If it's too hot, wrap it in a hand towel until it cools down. 

Posted in , , , , | 2 Comments

Fall Palette Challenge

Please Check out my Pinterest for sources.

It's that time of year where I start my seasonal sewing plan. Unlike in spring, where I completed say only three projects, I'd like to get a lot more sewing done this winter. Seeing as it's already like 40 degrees outside I have a feeling this winter is going to be a bad one. Nothing gets me more sewing productive than being stuck in the house. 

I haven't purchased any fabric for this yet, and it doesn't really match anything in my stash, which means I'll need to buy as I go. I'm not super stoked about that, but my stash right now is kind of all over the place. Nothing coherent is coming from that mess. I have some patterns in mind though I'd like to take a crack at, all of which I already own. 

Simplcitiy 1427 from 1955, I have a really well maintained copy in my size. I've never sewn from a true vintage pattern before, and it makes me a bit nervous. I expect there to be tons of fitting issues, but I could use some fitting practice. The full skirt and bow are staying well within my theme. 

Victory Patterns Nicola. This is such a beautiful dress. Really timeless. It seems pretty easy to put together as well, which is a plus. 

Simplicity 1776. I love the clean lines of view A with the three quarter length sleeves. I've never used a PR pattern before, I'm interested in what makes them unique. 


Ah the trusty, and free, sorbetto pattern. I plan on drafting some sleeves and a peter-pan collar to mimic the striped shirt in my mood board. 

I have a ton more patterns in mind as well. I'm in the process of organizing and documenting my pattern stash. It'll be easier to figure out what I want to sew once I know what I have. I also want to dip my toe into actual pattern drafting this winter. I need to make myself a good sloper. If that's something anyone is interested in, I could blog the process. 

Do you have any sewing plans this winter? 


Posted in , , , | 1 Comment

Sewing 101 : Envelope Pillow Tutorial


Basic Envelope Pillow
Supplies
-Fabric
-Seam Gauge
-Sewing Machine
-Pillow Form
-Measuring tape/Ruler
-Scissors
-Iron/Ironing Board
-Thread
-Pins

I know a lot of my friends in real life are amazed when I sew things that I consider very simple. I thought I'd start sharing some easy sewing projects for those of you who are just starting out. Sewing machines are pretty cheaply attainable now a days. Even Ikea has a basic one for 70$! This project is a good starting place, I'm writing it with the intention that you at very least know how to operate the most basic of sewing machine functions (threading, bobbin winding, using the presser foot, and actually sewing). This can also be done sewn by hand, but it won't look nearly as professional. Either way I think this is a good beginner project. I even added some buttons to mine as you'll see at the end of the post. I'll be doing a button hole tutorial a little latter in the week for those of you that are interested.

I tried to be very detailed, let me know if you need any help with the instructions!

Posted in , | 1 Comment

Thoughts On The New Victory Patterns' Patterns

As if I didn't have a large enough sewing to do list. 

Victory patterns went ahead and realeased some of the most beautiful, on trend, and modern sewing patterns I've ever seen. 

The back of the Roxanne blouse is really beautiful. It's so graceful. 

It's kept really classy casual with the front pocket and tie neckline here. 

This is another version of the Roxanne blouse. That collar, It's perfection. I know large peter pan collars have been quite popular this past year. This is a really refreshing modern take on that. Also a super A+ pick on the textile. 

Detail shot on the Simone dress/blouse. The details are great! I love the little seed stitch accenting. 

Simone is the only version on the hi-low trend I can dig. 

Here's the beautiful tulip wrap dress that is Nicola.  Really lady like and flattering. I'm thinking in black this could be the perfect LBD. Timeless. 

Here's the wrap top version of Nicola. There's something very ballerina about it. Beautiful photograph also. 

Once again Victory Patterns has killing it style wise. I feel pretty honored to be sponsored by such a wonderful company! 
I cannot wait to sew these up. 

Sew along anyone? 


Posted in , , , | 2 Comments

DIY dropcloth rug


To be honest this is less a rug and more a floor cloth. It's also one of my new favorite way to incorporate prints into my home. Oh and did I mention it's cheap? Pretty much one of my favorite DIY's of all time. For some of your time and about fourty dollars you can have an awesome new floor covering. This project could be more or less expensive depending on how much your fabric of choice costs, but since you only need around two yards I can't see this getting too crazy.

Supplies
Alene's tacky glue spray (11$)
Home depot 6x9 drop cloth (10$)
2 yards of wide heavier weight fabric, I used ikea's Stockholm print (18$)
Carpet gripper (already owned, but you can pick one up super cheap at Ikea, like five dollars cheap)
Sewing machine and thread
Seam gauge
Iron

Step one
If you plan on ever being able to throw your floor cloth in the washer, please prewash it as you plan on doing so in the future. This will save you from getting some funky shrinkage and ruining all your hardwork! I didn't use any fabric softener though, because I felt like any stiffness would help keep it from curling up. 

Step two
Iron out all those wrinkles once your fabric and drop cloth are dry. I even starched mine a bit. This will help you be able to sandwich the two pieces neatly with the glue. 

Step three
Smooth out the dropcloth and start applying the tacky glue spray. I then started rolling out the fabric, right side up and sticking it to the drop cloth, slowly removing any bubbles with my hands. I ended up using the whole can, so feel free to be liberal with your spraying. It'd be a good idea to wear a mask and do this part outside. Unless glue fumes are your thing. 

Step four
Once everything is nice and glued, give it a few minutes to set, trim the drop cloth to the edge of the fabric. Flip it so the fabric side is down and start ironing over about a 1 to 1.5 seam allowance using your seam gauge. That seams kind of big, but I think it adds even more weight to the finished product. 


Step five
Once everything is ironed go ahead and hem everything up. You can pink your seam allowance if you want but I really didn't think it was required.


Step six
Trim your carpet gripper to fit and lay that bad boy down. Stand back and admire your work.


I think I might even tack some thick felt or wool to the back of this to add some cushion, but besides that I'm very happy with it! For those of you worried about it not staying put, never fear! I did the twist and shout test, plus the crazy dog after a bath test. In my very scientific studies it moved nay once. I even vacuumed it, with my sweeper brush on, and it worked out fine.

Really theres no reason not to give this little rug a try! 

For your time, here's the previously mentioned crazy dog photobombing my rug shots.


Inspired by this tutorial.

Posted in , , , | 11 Comments

DIY Clothing Label Tutorial

Supplies
  • Iron on transfer printer paper
  • Computer & Printer
  • Scissor 
  • Iron
  • Sewing Machine
  • Twill Tape
  • Photoshop or Other Image editing Software. 


Step One
1.Open up Photoshop, or a similar program. Select the dimensions of Letter Paper or 8.5x11 inches. Depending on your twill tape size your going to want to size your font accordingly. I used 1.5 inch twill tape. Leave enough room so it's easy to sew around. Try to fit as many labels per sheet you can.


Step Two
2. In photoshop go to the Image tab in the file bar.
Image>>Rotate Image>> Flip Horiztonal  That will reverse your image. This is basically the most important step! If the labels do not print out as a mirror image they will read backwards when applied! Before you print I recommend doing a test sheet just take make sure everything is a-okay!


Step Three
3. I found it easiest to use my junk rotary cutter* and a ruler to cut all the transfer out. Cut them small enough to fit on your twill tape!
*Please don't use rotary cutters or scissors that are for fabric! You'll kill your blades! I have a special rotary cutter that I cut anything besides fabric with! 


Step Four
4. Cut your twill tape in lengths about and inch longer than you need! Center the transfer on the twill tape and iron those suckers down! Follow the instructions provided with your iron on transfers. Peel off and marvel at how awesome you are! 


Step Five
5. I fold the ends over about a half inch towards the back, using a pressing cloth I iron them. Pin into your garment and sew around the edge! These can also be sewn on lining if you don't want the stitching to show on the back of the garment. Most of the time it's really not noticeable anyway! I make a few at a time and pin them to my IRL pinboard. It keeps the ends tucked under so I can just grab one when I'm ready! 


*For those of you worried about these tag standing up to washing; I took the dress with me on vacation, it was worn through theme parks, in the ocean, and multiple washings and dryings. It still looks great! 

Posted in , , | 7 Comments